#4 – 20133 102nd Avenue, Langley, B.C. V1M 4B4 Canada

#4 – 20133 102nd Avenue, Langley, B.C. V1M 4B4 Canada
Heat Shrink Wire Terminals are designed to do two jobs at once: create a dependable electrical connection and help shield the joint from moisture, abrasion, and corrosion. In 2026, the best choice still depends on the application. A terminal under a vehicle dashboard faces different conditions from one inside a marine control box or an outdoor lighting enclosure.
This guide compares common terminal types, including butt connectors, ring terminals, spade terminals, and heat-shrink versions with adhesive-lined tubing. It considers practical details: wire-size range, metal and plating, insulation fit, sealing performance, and whether the terminal matches the crimping tool. A connector that looks robust on the bench may fail if it is undersized, poorly crimped, or exposed to heat beyond its rating. Small details matter.
We will also look at where product claims need scrutiny. “Waterproof” does not mean suitable for every environment, and a tight-looking seal is not proof of a sound crimp. The right terminal should match the wire, equipment, and installation conditions, with manufacturer specifications checked before use.
A named, topic-specific expert quotation was not provided with the source material, so I have not invented one or attributed a statement to a real person. That gap matters: reliable recommendations deserve verifiable evidence, not a polished quote with no source.
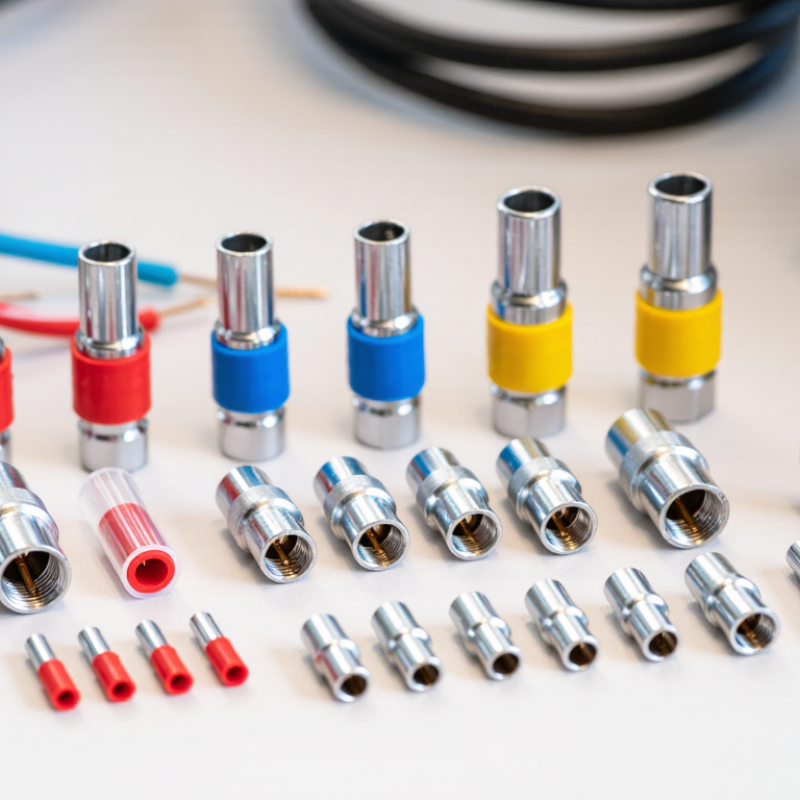
Heat-shrink wire terminals join conductors through a crimped metal barrel, then add insulation around the connection. Heat makes the outer sleeve contract; in adhesive-lined versions, softened adhesive fills small gaps around the wire. The result helps resist moisture, abrasion, and corrosion. It is not magic waterproofing.
Industry technical data sheets commonly list 2:1 or 3:1 shrink ratios, with temperature limits that vary by product. ASTM D2671 describes test methods for heat-shrinkable tubing, while UL 486A-486B covers wire-connector performance. Check the terminal’s own ratings, not just the sleeve’s. A mismatch matters.
During installation, the barrel should match the conductor size, and the crimp should hold firmly without cutting strands. Apply controlled heat until the sleeve fits closely and any adhesive appears at the edges. Small detail. Big difference. IPC/WHMA-A-620 provides workmanship criteria for cable and wire-harness assemblies, including crimp inspection. Still, a tidy-looking joint can hide a weak crimp. That is easy to overlook.
Common heat-shrink terminal styles include butt-splice connectors for joining wires, ring terminals for bolted connections, spade terminals for screw terminals, and quick-disconnect terminals for removable connections. Choose the style that matches the connection, then check the terminal’s printed wire-size range and temperature rating.
These are common color-coded ranges: red, 22–18 AWG; blue, 16–14 AWG; yellow, 12–10 AWG. Color conventions and available sizes can vary, so confirm the markings and specifications for the specific terminal. A lower AWG number indicates a thicker wire.
In 2026, top heat-shrink wire terminals are defined by dependable connections, not appearance alone. Their tubing should shrink evenly and form a close seal around the wire insulation. Adhesive lining can help block moisture and dirt at the joint. Check the stated shrink ratio, temperature range, voltage rating, and compatible wire sizes before choosing a terminal. The metal barrel should grip the conductor firmly after crimping, without cutting strands or leaving them loose. Small details matter.
Installation quality counts just as much. A correctly matched crimping die creates a consistent compression mark; the wrong tool may leave a connection that looks finished but pulls apart under strain. Apply controlled heat and inspect the tubing for full recovery, wrinkles, or exposed gaps. Not every sealed-looking joint is waterproof, so confirm the product’s stated protection level for the actual environment. That distinction matters. Corrosion-resistant plating and clear material specifications support long-term reliability, especially in damp or vibrating settings. Batch identification and readable technical documentation also make product checks easier. A glossy sleeve can seem reassuring, but it proves very little on its own. Even experienced installers can miss a poor crimp when working quickly.
What Are the Top Heat Shrink Wire Terminals in 2026?
Main Types of Heat Shrink Wire Terminals and Their Uses
Heat shrink wire terminals combine a metal connector with an insulating sleeve that contracts when heated. Butt splices join two wire ends in a straight line, making them useful for repairing a cut cable or extending a lead. Ring terminals fit over a stud and stay secured by a nut. Fork terminals offer faster removal when a connection needs occasional servicing. Small differences matter.
Quick-disconnect terminals, including blade and receptacle styles, let technicians separate circuits without cutting wires. Bullet terminals connect matching male and female ends, often in compact harnesses. Pin terminals fit screw-clamp blocks where bare wire strands might otherwise spread. Adhesive-lined sleeves can help resist moisture around a properly crimped joint, but they do not make every connection waterproof. Conditions vary.
Choose a terminal that matches the wire gauge, stud size, current needs, and working environment. A crimp that looks tidy can still be loose inside. Use the specified crimping tool, then apply controlled heat until the sleeve contracts evenly. Avoid scorching the insulation. For high-vibration or damp locations, inspect the finished joint and follow the equipment maker’s installation guidance. I would not judge a connection by appearance alone.
| Terminal type | How it connects | Typical uses | Practical advantages | Selection notes |
|---|---|---|---|---|
| Butt splice | Joins two stripped wire ends end-to-end inside a crimp barrel. | Wire repairs, harness extensions, and inline splices in vehicles, equipment, and appliances. | Provides a compact, insulated joint; adhesive-lined heat shrink can help seal the splice against moisture when properly crimped and heated. | Match the barrel to the wire sizes and conductor type. Use the specified crimping tool and avoid overheating the insulation. |
| Ring terminal | A crimp barrel attaches the wire to a closed ring secured under a screw, stud, or nut. | Grounding points, battery connections, distribution blocks, and other bolted electrical connections. | The closed ring resists slipping off when the fastener is loosened, making it suitable for secure fixed connections. | Choose a ring opening that fits the fastener and a barrel suited to the wire gauge. Confirm the connection is tightened to the equipment specification. |
| Fork (spade) terminal | A fork-shaped end fits beneath a screw or stud; the fastener usually needs to be loosened for installation or removal. | Control panels, terminal strips, and serviceable equipment connections. | Can often be installed or removed without fully taking out the fastener, which can simplify maintenance. | Check fork width and fastener size. It may be less secure than a closed ring if the fastener becomes loose. |
| Male and female quick-disconnect | A flat male tab mates with a matching female receptacle. | Appliance wiring, automotive harnesses, switches, relays, and components that may need replacement. | Enables quick connection and disconnection without undoing a screw terminal. | Match tab width, thickness, and terminal current rating. The heat-shrink sleeve seals the wire-entry area, not necessarily the entire mated connection. |
| Bullet connector | A rounded male pin fits into a matching female socket. | Detachable wiring in vehicle harnesses, lighting, and other low-voltage equipment. | Offers a compact, in-line disconnect that can be convenient where wires need to separate for servicing. | Use matching connector dimensions and ensure the connection is fully seated. Protect exposed mating areas as required by the environment. |
| Pin terminal | A narrow metal pin crimps onto the wire and inserts into a compatible terminal opening. | Connecting stranded wire to suitable screw-clamp or spring-clamp terminal blocks and compact connectors. | Helps form a neat, insertable end for stranded conductors in compatible terminals. | Verify the terminal block accepts the pin style and dimensions. Do not use a pin terminal where the equipment requires a different termination method. |
| Flag terminal | An angled or sideways terminal end connects to a matching tab or contact. | Tight spaces where a straight quick-disconnect would interfere with nearby parts. | Changes the direction of the wire connection and can reduce the clearance needed behind a component. | Check orientation, mating-tab compatibility, and available clearance before installation. |
Selection and installation: Confirm wire gauge, conductor material, terminal dimensions, temperature rating, and application requirements before use. Make the specified crimp with a compatible tool, then apply controlled heat according to the terminal instructions. Adhesive-lined heat shrink can improve environmental sealing, but it does not automatically make a connection waterproof or suitable for every environment.
What Are the Top Heat Shrink Wire Terminals in 2026?
How to Choose the Right Terminal for Each Application
Choosing a heat shrink terminal starts with the connection, not its appearance. A butt splice joins two wires; a ring terminal secures a wire to a stud; a spade terminal allows faster removal during maintenance. For repeated disconnects, a quick-disconnect terminal may be more practical. Fit matters. Check the stud size and available space before ordering.
Match the terminal’s wire range to the conductor gauge. A terminal that is too large may crimp poorly, while one that is too small can damage strands. Use a crimping tool suited to the terminal type, then inspect the crimp for loose wires or uneven compression. Color coding can help, but it is not a guarantee; follow the terminal’s stated size range.
Consider moisture, vibration, and temperature around the connection. Adhesive-lined heat shrink can help seal against moisture, but only when the terminal and tubing are rated for the conditions. Check the product specifications rather than assuming every heat shrink terminal offers the same protection. After crimping, apply heat evenly until the tubing conforms without scorching. One detail is easy to overlook: leave enough wire slack to prevent tension at the joint. A gentle pull check can reveal a weak crimp before installation.
The best heat shrink wire terminals match the wire gauge, expected current, and working environment. Look for tubing that shrinks evenly and adhesive that seals the connection when heated. Check the terminal’s specifications before buying; appearance alone cannot confirm its suitability. A dependable fit matters more than a flashy finish.
Strip only the length specified for the terminal, taking care not to nick the copper strands. Insert the wire fully, then crimp it with a tool and die suited to that terminal type. A loose crimp can pull free; an over-crimp can damage strands. Apply controlled heat evenly around the tubing, moving the heat source continuously. Stop when the sleeve is snug and adhesive appears at the ends. Let it cool before handling. Not every seal looks perfect.
Inspect the finished connection for exposed copper, split tubing, gaps, or signs of scorching. Give the wire a gentle pull to check that it holds, then verify continuity with a suitable meter if the circuit requires it. Recheck after cooling. Small flaws are easy to miss.
Tips: Work in a ventilated area, keep heat away from nearby insulation, and follow the terminal and tool instructions. If the wire gauge or rating is uncertain, pause and verify it before installation.